Last Updated: October 29, 2026
Quick Summary
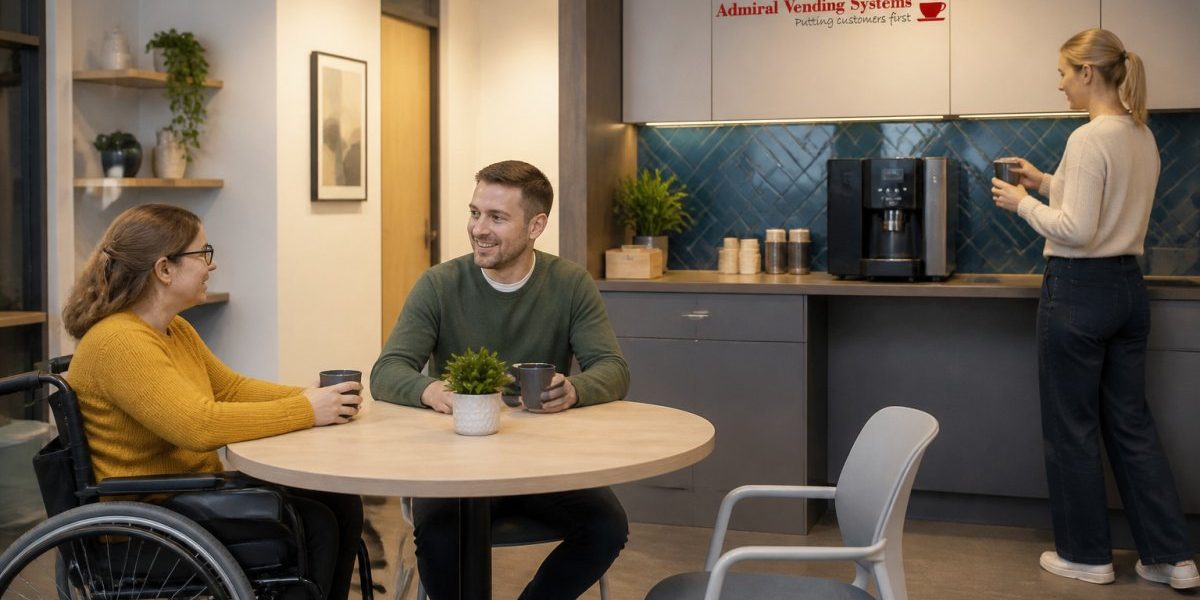
An accessible breakroom is one that every member of staff can enter, move around, sit in and use without help. Start with a walk-through audit, clear the route into the room, add varied seating and place kitchen equipment, storage and controls within easy reach. Most of these fixes are low cost.
- Walk through the room as a new user, from the entrance through each stage of a typical break.
- Keep main pathways at least 1.2 metres wide and never block the route to the kitchen or exit.
- Offer a mix of seating, including chairs with arms and at least one height-adjustable table.
- Keep a worktop section with clear space underneath so a wheelchair user can pull up close.
- Repeat the audit every six months and after any refurbishment, as needs change over time.
Table of Contents
- Why an Accessible Breakroom Matters for Every Member of Staff
- Step 1: Run a Practical Breakroom Accessibility Audit
- Step 2: Clear the Route In and Around the Room
- Step 3: Choose Comfortable, Varied and Height-Adjustable Seating
- Step 4: Make the Kitchen Usable for a Wheelchair User
- Step 5: Place Storage, Appliances and Controls Within Reach
- Step 6: Cater for Sensory, Cognitive and Non-Visible Disabilities
- Step 7: Consult Staff, Test Changes and Book Your Breakroom Review
- Frequently Asked Questions
Making an office breakroom accessible is one of the simplest ways to show staff that everyone matters. A breakroom that a colleague with limited mobility, a sensory impairment or a cognitive difference cannot use comfortably is not really a shared space at all. A few practical changes to layout, seating and kitchen equipment can make a breakroom work for the whole team.
Why an Accessible Breakroom Matters for Every Member of Staff
The breakroom is where people eat, rest, talk and recharge.
An accessible breakroom is one that people can enter, move around, sit in and use without needing help or extra effort.
Accessibility also supports fairness.
Step 1: Run a Practical Breakroom Accessibility Audit
Before you change anything, walk through the room as a new user would. Start at the entrance and go through each stage of a typical break: getting in, collecting a drink, finding a seat, using the sink and leaving. The aim is to record what actually happens, not what the room was designed to do.
What to measure and check
Work through the room with a simple checklist and note measurements where you can. A few practical reference points help:
- Doorway clear width: check that the opening is wide enough for a wheelchair or mobility aid, and that the door can be opened with one hand and little force
- Main circulation route: aim for a clear path of at least 1.2 metres between tables, counters and furniture, and check it at busy times when bags and queues spread out
- Worktop and sink reach: note the height of the main work surface and whether there is clear space beneath it for a seated user
Score each issue
Record each issue and rate it on two simple scales: how often it affects daily use (every break, most days, occasionally) and how much it blocks a task (cannot use at all, can use with difficulty, minor inconvenience). An issue that stops someone using the kitchen every day should come before a cosmetic problem that is mildly annoying once a week. This gives you a rough priority order without needing a formal scoring system.
Involve the people who use the room
Ask a few colleagues, including anyone with a disability or long-term condition, to do the same walk-through and note what they find awkward. Their experience often reveals problems you would miss, such as a door that is technically wide enough but heavy to pull, or a route that is clear until a chair is moved.
An audit is not a one-off. Repeat the walk-through every six months and after any refurbishment, because needs change as teams grow and equipment is replaced.
Record each issue, rate it by how much it affects daily use and decide which changes to make first. Many fixes are low cost, such as moving a chair, clearing a pathway or relocating a kettle. Keep the audit notes so you can show what has been fixed and what is still outstanding.
The audit checks a handful of measurements and features, each with a reference point to aim for.
| Check | Reference point | What to look for |
|---|---|---|
| Doorway clear width | Wide enough for a wheelchair or mobility aid | Opens with one hand and little force |
| Main circulation route | At least 1.2 metres | Clear between tables, counters and furniture |
| Worktop and sink reach | Clear space beneath for a seated user | Height of main work surface |
| Appliance controls | Reachable height | Kettle, microwave, coffee machine and vending clearly labelled |
| Seating | One table height suits a seated person | Space beside table for a wheelchair or aid |
| Floors and lighting | Even surfaces | Loose mats, trailing cables, uneven thresholds, flickering light |
Step 2: Clear the Route In and Around the Room
The route into and through the breakroom sets the tone for everything else. If people cannot get in and move around, the other improvements will not be used.
Doorways, ramps and thresholds
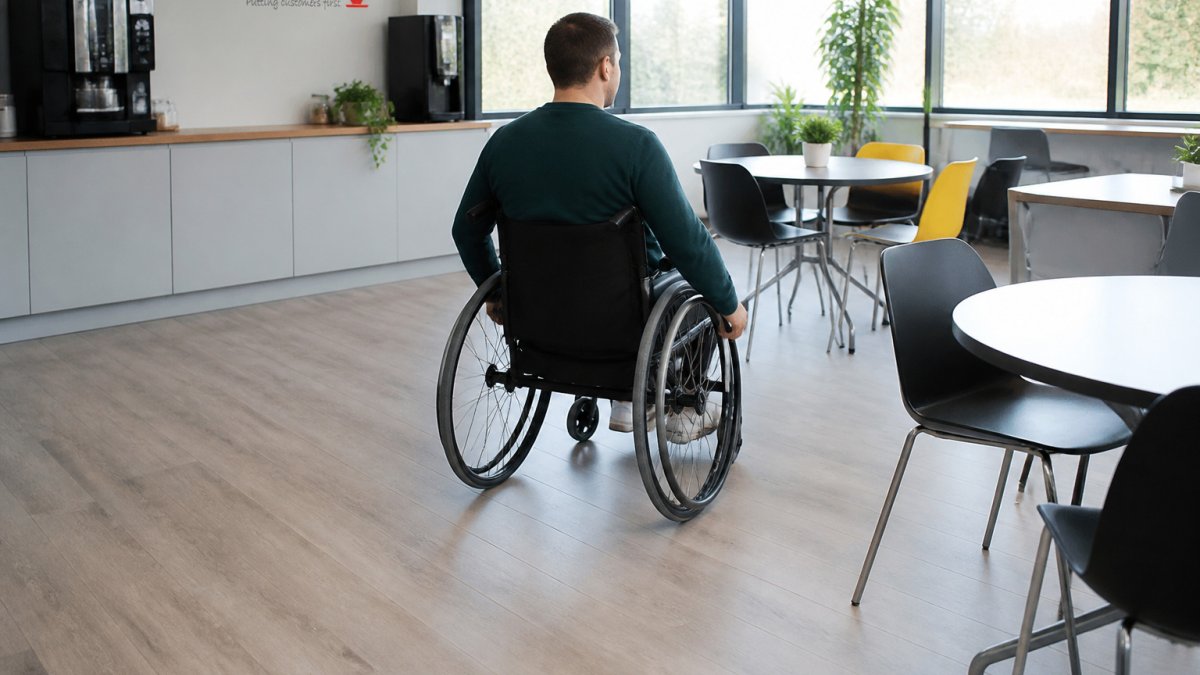
Check that the doorway is wide enough for a wheelchair and that the door can be opened with one hand and little force. Remove any raised threshold or replace it with a smooth, low ramp.
Where the room is reached by steps, a ramp or lift may be needed. Consult the relevant building and access guidance for your site before making structural changes.
Circulation space and furniture layout
Furniture layout decides whether a room feels open or cramped. Our guide to creating a multi-use office breakroom layout shows how to arrange furniture and circulation space.
A simple rule: the route from the door to the kitchen, to a seat and to the exit should never be blocked. Check it at busy times, when coats, bags and queues spread into walkways.
Step 3: Choose Comfortable, Varied and Height-Adjustable Seating
Not everyone sits in the same way or for the same length of time.

Commercial Bean to Cup Coffee Machines UK | Barista-Quality Coffee Made Easy
Admiral Vending Systems
Aim for:
- Chairs with arms that help people stand up
- Stable chairs that do not tip or slide
- A range of seat heights, including some with a firm, supportive back
Height-adjustable tables are especially useful. They let a person in a wheelchair sit at the table with their knees clear, and they suit people of different heights.
Keep the seating area clear of trip hazards and make sure there is a place to rest a bag or crutches nearby.
Step 4: Make the Kitchen Usable for a Wheelchair User
The kitchen is often the hardest part of the breakroom to use. Focus on the things people do every day: filling a kettle, making a drink, heating food, washing a cup and putting it away. The most useful approach is to work through each appliance and surface in turn, checking reach, clearance and control design.
Worktops and the sink
Where possible, include a section of worktop at a lower height, or keep an area clear beneath the counter so a wheelchair user can pull up close. A common pattern is to provide at least one worktop section with clear space underneath and no cupboard or plinth in the way. Make sure taps are easy to operate, ideally with a lever rather than a tight twist, and consider a mixer tap that can be used with one hand.
Kettle, microwave and hot water
Place the kettle and microwave on a counter that a seated user can reach without leaning across another appliance. Controls should be at the front of the appliance, clearly labelled and simple to operate. Avoid placing a microwave above head height or below knee height. If a wall-mounted boiler or hot water dispenser is used, check that the tap or lever is reachable and that the dispensed water lands over a safe surface rather than a narrow ledge.
Fridge and chilled storage
A fridge that opens at the top and requires a user to reach in over the door is difficult for many people. Where possible, choose a model with a lower shelf that is easy to reach and a door that opens with light force. Keep frequently used items such as milk and cold drinks on a middle shelf rather than at the back or on the bottom.
Coffee and vending machines
Machines with controls at a reachable height, clear labels and simple, large buttons are easier for everyone. You can read about essential features to look for in an office coffee machine before you choose one. Position the machine so the user can stand or sit in front of it, with the drip tray and water tank reachable without lifting over a high edge. Our guide on how to design an office coffee station explains how to plan placement around the rest of the kitchen.
Cups, plates and cutlery
Consider how staff collect and put away their own items. Keep the most-used items on lower shelves or in drawers that pull out fully. Heavy items such as stacks of plates should sit at waist height rather than high up. A simple rule is that anything a person needs for a hot drink or a snack should be reachable from a seated position without stretching or twisting.
Walk through the kitchen with a tray in one hand and imagine you cannot bend or reach above shoulder height. Anything you cannot access one-handed is a candidate for relocation.
If structural changes such as lowering a worktop or moving a sink are not possible, a portable low table or a pull-out shelf can provide a temporary reachable surface. Review the kitchen layout whenever appliances are replaced, because a new machine can undo good work if it is placed without checking reach and clearance. For guidance on keeping the room clean for everyday use, see our essential hygiene protocols for shared office kitchens.
Step 5: Place Storage, Appliances and Controls Within Reach
Reachable storage and controls are among the cheapest and most effective improvements you can make. Most people can comfortably reach between roughly the height of their shoulder and their hip.
Review what is stored where:
- Move cups, mugs, plates and snacks to lower shelves
- Keep heavy items at waist height rather than high up
- Place frequently used appliances on a counter that can be reached without reaching across another item
Avoid leaving items on top of appliances or on the floor, where they create obstacles. A simple habit of returning things to their place keeps the room usable for everyone.
Step 6: Cater for Sensory, Cognitive and Non-Visible Disabilities
Accessibility is not only about wheelchairs and steps. Many disabilities are not visible, and some staff find a breakroom hard to use because of noise, glare, crowding or confusing layouts.
Consider the following:
- Reduce background noise where you can, for example with soft furnishings or by placing the vending or coffee area away from a quiet corner
- Use lighting that is bright but not harsh, and avoid flickering lights
- Keep layouts simple and predictable so people can find things without searching
Clear, consistent labelling also helps people with dyslexia or limited English. Use short words and familiar symbols where possible.
Step 7: Consult Staff, Test Changes and Book Your Breakroom Review
The most useful feedback comes from the people who use the room every day. Ask staff, including colleagues with disabilities, what would make the breakroom easier to use.
Once you have a plan, test changes before you commit to them.
Finally, review the breakroom on a regular schedule, for example every six months or after any refurbishment. Needs change as teams grow, staff join and equipment is replaced.
If you want expert help, Admiral Vending can advise on coffee and refreshment equipment that suits your space. You can get your instant quote for commercial coffee machines and find out what would work for your team.
Frequently Asked Questions
How can I make an office breakroom more accessible?
Start with a short audit of the entrance, route, seating, kitchen and storage, noting anything a wheelchair user, a colleague with low vision or someone with limited reach would struggle with. Prioritise changes that remove barriers first, such as clearing pathways, lowering frequently used items and fitting a height-adjustable table. Many fixes cost little, like rearranging furniture, moving the kettle and adding clear labels, and can be done before any larger refurbishment.
How much space should there be between furniture in an accessible breakroom?
Leave clear circulation routes wide enough for a wheelchair to turn and pass without reversing, and keep the main walkways free of bags, bins and chair backs. Check the arrangement by sitting in a wheelchair, or by asking a wheelchair user to test it, rather than relying on a single measurement. Keep tables spaced so a person can pull out a chair and sit without moving other seats.
What makes a kitchen or breakroom accessible for staff with disabilities?
A usable kitchen has reachable worktops, sinks and appliances, accessible controls and storage within a comfortable reach range, and clear floor space in front of each station. Choose appliances with simple controls and visible labels, and consider drinks machines positioned at a height that suits seated and standing users. Accessible electrical outlets and well-lit surfaces help everyone use the space safely and independently.
How can staff give feedback about breakroom accessibility?
Set up a simple, anonymous way for colleagues to report barriers, such as a suggestion box, an online form or a named contact in facilities or HR. Invite staff with different needs to walk through the room and test the changes before they are finalised. Review feedback regularly and tell staff what has changed as a result, so people keep sharing problems they notice.
Making the breakroom accessible is a practical investment in your team. Start with the audit, fix the route in and the reachable areas first, and build from there. Each change makes the room more welcoming for everyone who uses it.